A Few Tricks Make It Easy To Paint With Watercolors
I hadn’t painted in watercolors for some time, so it was fun rediscovering the medium over the past week. Watercolors have a reputation of being tricky to use—difficult to control, impossible to correct mistakes, etc. etc.
However, as I worked, I remembered that if you follow a few rules, watercolors aren’t really all that difficult. In fact, they’re really fun to use, and satisfying results aren’t easy to achieve.
RULE #1: USE AS LITTLE WATER AS POSSIBLE. Here’s how.
-
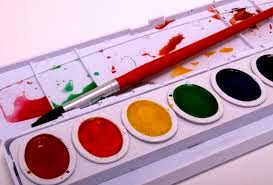
Begin by using your brush to drip a few drops of water on each pan of dry watercolors to get them moistened.
-
When you start to paint, dip your brush in water, and then wipe the brush to get rid of any excess water.
-
When you brush over the paint pan, you want a brush that’s quite damp, but not dripping wet.
RULE #2: BRUSH YOUR PAINT ON A PAINT PALETTE BEFORE YOU BRUSH IT ON THE PAPER
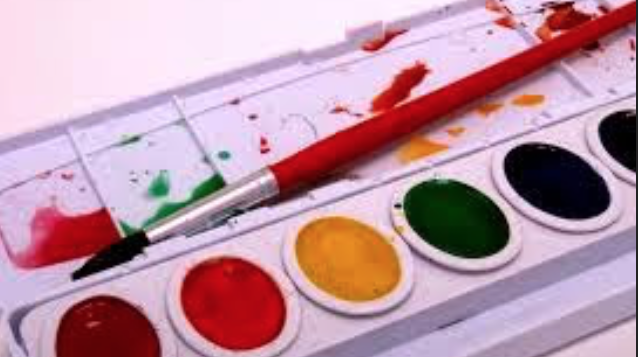
-
If you brush the paint on a palette (I use the lid of my watercolors) you can see how intense the paint is before you put it to paper. As you’ll see in a minute, controlling paint intensity is THE key to making watercolors work for you.
-
If you are mixing colors, using the palette gives you a chance to make sure you’ve got the hue you want before you put color to paper.
RULE #3: PAINT IN LAYERS. The best way to avoid mistakes with watercolors is to PAINT IN LAYERS!!
I was trying to achieve a stained glass effect, so after taping the drawing down I drew over it with a black paint/glue mixture.


The first layer of actual paint is a very light planning layer. Loosely paint a very light intensity of paint to make an overall plan of where you will place the main colors. This layer is so light that, if you don’t like the choices you have made, you can easily change them by painting over them with another color.
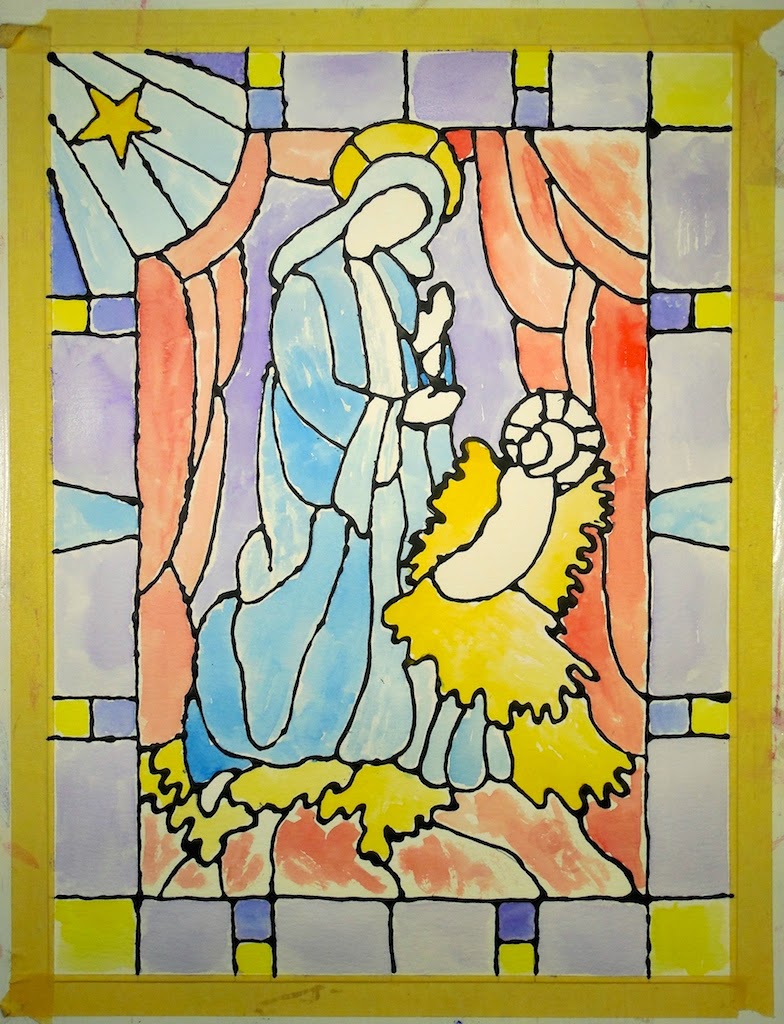
Now that you have an idea of what colors to use, you can play within that color range. This is the time to make varieties of the same color, add intensity, etc.


Once you’re close to the color, it’s time to add details: highlights, shadows, etc.

The advantage of watercolors is that they are transparent, and after several layers of this transparent paint, this is what I ended up with.

I hadn’t painted in watercolors for some time, so it was fun rediscovering the medium over the past week. Watercolors have a reputation of being tricky to use—difficult to control, impossible to correct mistakes, etc. etc.
However, as I worked, I remembered that if you follow a few rules, watercolors aren’t really all that difficult. In fact, they’re really fun to use, and satisfying results aren’t easy to achieve.
RULE #1: USE AS LITTLE WATER AS POSSIBLE. Here’s how.
-
Begin by using your brush to drip a few drops of water on each pan of dry watercolors to get them moistened.
-
When you start to paint, dip your brush in water, and then wipe the brush to get rid of any excess water.
-
When you brush over the paint pan, you want a brush that’s quite damp, but not dripping wet.
RULE #2: BRUSH YOUR PAINT ON A PAINT PALETTE BEFORE YOU BRUSH IT ON THE PAPER
-
If you brush the paint on a palette (I use the lid of my watercolors) you can see how intense the paint is before you put it to paper. As you’ll see in a minute, controlling paint intensity is THE key to making watercolors work for you.
-
If you are mixing colors, using the palette gives you a chance to make sure you’ve got the hue you want before you put color to paper.
RULE #3: PAINT IN LAYERS. The best way to avoid mistakes with watercolors is to PAINT IN LAYERS!!
I was trying to achieve a stained glass effect, so after taping the drawing down I drew over it with a black paint/glue mixture.
The first layer of actual paint is a very light planning layer. Loosely paint a very light intensity of paint to make an overall plan of where you will place the main colors. This layer is so light that, if you don’t like the choices you have made, you can easily change them by painting over them with another color.
Now that you have an idea of what colors to use, you can play within that color range. This is the time to make varieties of the same color, add intensity, etc.
Once you’re close to the color, it’s time to add details: highlights, shadows, etc.
The advantage of watercolors is that they are transparent, and after several layers of this transparent paint, this is what I ended up with.