Level IV-Art Lesson 6: Draw Like an Ancient Egyptian
Learn to draw people using a system invented by ancient Egyptians
The lesson is suitable for students in grade 6 through adult.
Art Lesson Description:
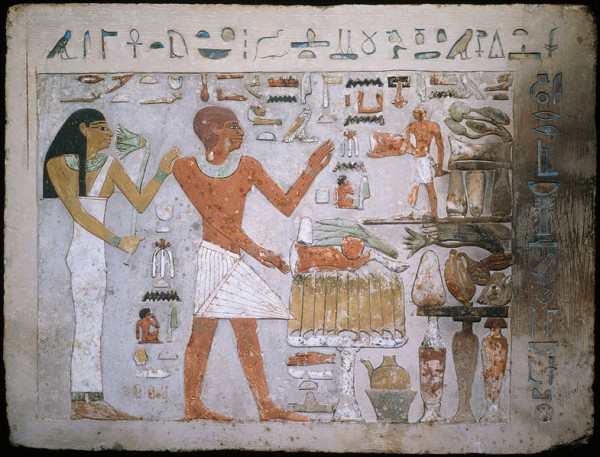
Visit any exhibit of artifacts from the tombs of ancient Egypt, and you cannot help but notice the distinctive style that ancient Egyptians’ used to draw people. Their style has several distinguishing features that remained constant for almost 2000 years.
- They show the side of the head, the front of the chest, the side of hips and legs, and the inside arch of both feet. (Try standing that way!)
- The style helped emphasize the rank and function of the person being pictured. This was important information, since the art was meant to help usher the entombed persons to their place among the gods.
The problem in this lesson is learn to use the same grid that Aneicnt Egyptians used to draw people.
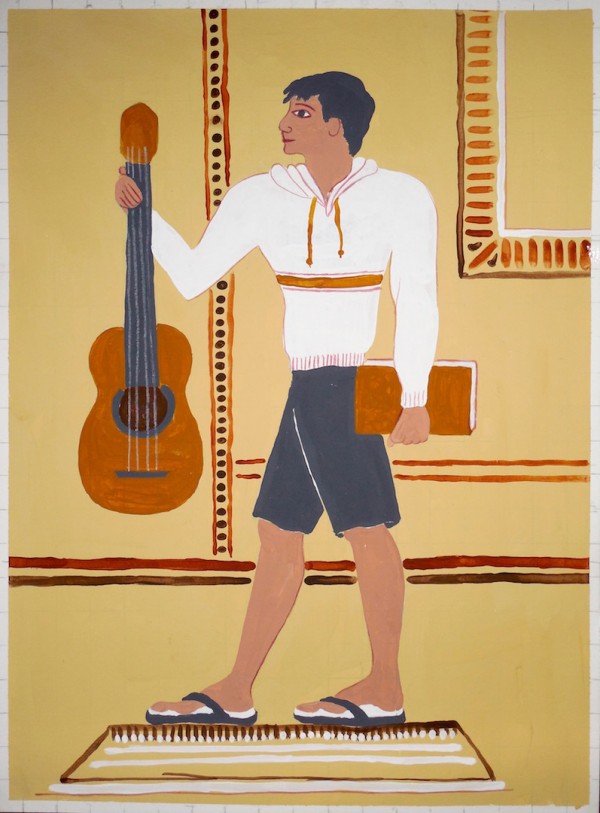
- You will have the opportunity to finish the drawing either as a portrait of an ancient Egyptian or as a portrait of your friend.
- If you draw this as a picture of your friend, you will quickly see how the style makes everyone look pretty much the same. No one will turn out looking tall or short, broad or slender—but they WILL look very human!
This lesson includes both POWERPOINT and VIDEO versions of the lesson plus 2 downloadable printouts: a warmup and a grid with the Egyptian figure.
List of Supplies for Each Student:
- 1 copy of the warm-up (this is included with the lesson)
- 1 fine tipped permanent black marker (#ad)
- 1 pencil
- 1 sheet of 11" x 15" watercolor paper (#ad)
- A 12-inch (or 30 cm.) ruler
- Tempera paints (#ad) or acrylic paints (#ad) that include burnt sienna, and pink (Egyptians used the darker color for men/boys and the lighter color for women/girls)
- Set of brushes (#ad)
- Masking tape (#ad)
- Paint palette (#ad)
- Drawing board (#ad) (Make your own by cutting an 18" x 24" piece of 1/4" masonite)
- 1 bottle or cup for rinsing brushes
Suggestions for Cross-Curricular Connections:
Science: Study the enormous scale of Egyptian architecture, and learn what tools they used to build their monuments. Their carvings and paintings did not decompose significantly, even though they are about 4000 years old. Find out why. Here's a website to get you started.
History and religion:
- Ancient Egyptians worshiped the sun god Re and believed that the pharaoh was a god. How does this affect their art? How does the Egyptian worship of Re affect the Biblical story of the Exodus? Here are two helpful websites.
- Read Ancient Egypt: Everyday Life in the Land of the Nile (#ad) by
Math: Egyptians measured things in cubits (the distance from the elbow to the tip of the fingers). A cubit was 6 hands long, and a man was considered to be 3 cubits tall. Find the proportions of the head, the arm, or the legs to the whole body, and then compare the Egyptian proportions to the proportions of your own body.
- Learn how different cultures uses different lengths of cubits.
- Learn more about Egyptian math, cubits, and other units of measurement.
Literature:
- Listen to Jim Weiss's retelling of Egyptian myths on the CD Egyptian Treasures: Mummies and Myths (#ad) Read The Cat of Bubastes (#ad) by G. A. Henty or listen (#ad) to a recording of the story.
- Read Day of Ahmed’s Secret (#ad) by Florence Parry Heide - a peek at modern Egypt that is written for elementary students.
- For a taste of ancient Egypt, read Mrs. Frizzle’s Adventures: Ancient Egypt (#ad) by Joanna Cole for elementary students.
Estimated Time to complete the Art Class:
- Preparing the grid: 25 minutes
- Drawing the figure: 25 minutes
- Dressing the figure and painting the figure: 45 minutes
- Total time: 95 minutes