Dealing With an Art Project That Didn't Turn Out
We’ve just added a new art lesson to the ArtAchieve website, The Carvings of Capernaum, and creating the lesson was an emphatic reminder that sometimes art projects DON’T turn out the way we had hoped.
In Capernaum, on the north shore of the Sea of Galilee in Israel, we had found some carvings in the ruins of a synagogue where Jesus had preached.
Here is what remains of the synagogue.

And here are the carvings that inspired us to create a new art lesson.
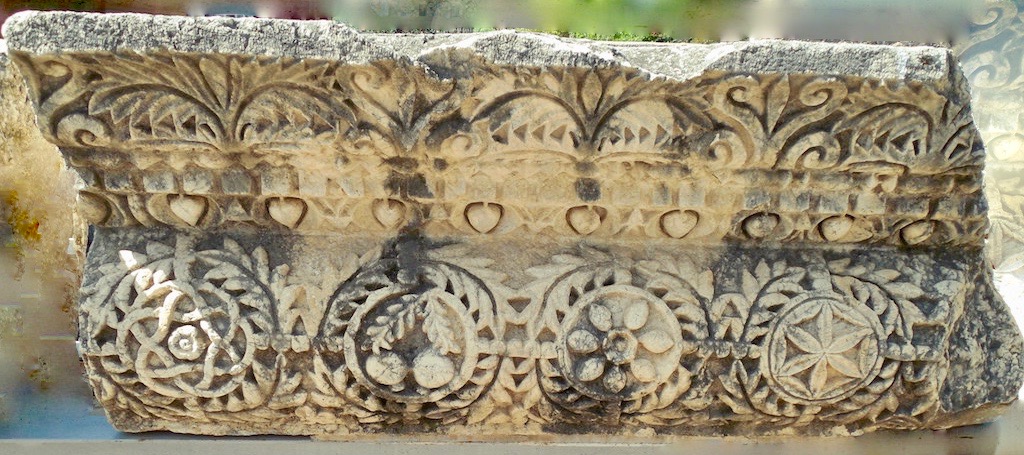
We decided to use an art technique called India ink resist, a technique that uses tempera paint and India ink to produce beautiful, worn black lines that are almost impossible to produce any other way. They would be a perfect reflection of the synagogue carvings.
Unfortunately, the project was a failure. I’ll explain why shortly, but it was a good lesson for us in dealing with the question of what to do when a project “doesn’t turn out.” In our case, we went to plan B, and the whole experience was a good lesson in persistence.
Here’s how India ink resist is SUPPOSED to be done, in order to get those beautiful black lines.
-
Step 1: On a sheet of watercolor paper, you draw a picture using a drawing medium of your choice - pencil, chalk, colored pencils work well. We used colored chalk. It makes a nice fat line, and it disappears under India ink.
-
Step 2: You use tempera paint to paint any part of the paper that is NOT covered with a line. The idea is that tempera paint - and any ink that is on the paint - can be washed off the paper later.
-
Step 3: You paint over the picture with India ink. You can concentrate on painting only the chalk lines - the part without tempera paint - or you can cover the entire paper with ink.
-
Step 4: You take the paper that is now covered with ink and tempera paint to the sink, and run water over it, gently rubbing the paint until it washes away. What is left is the black line of ink wherever there was no tempera paint.
However, we discovered one complicating factor that makes all the difference. Not all tempera paints interact the same way with India ink!
To insure that the technique would work for ANYBODY, I bought three brands of tempera paint, a professional brand (ProArt), and two student brands (School Smart and Crayola).
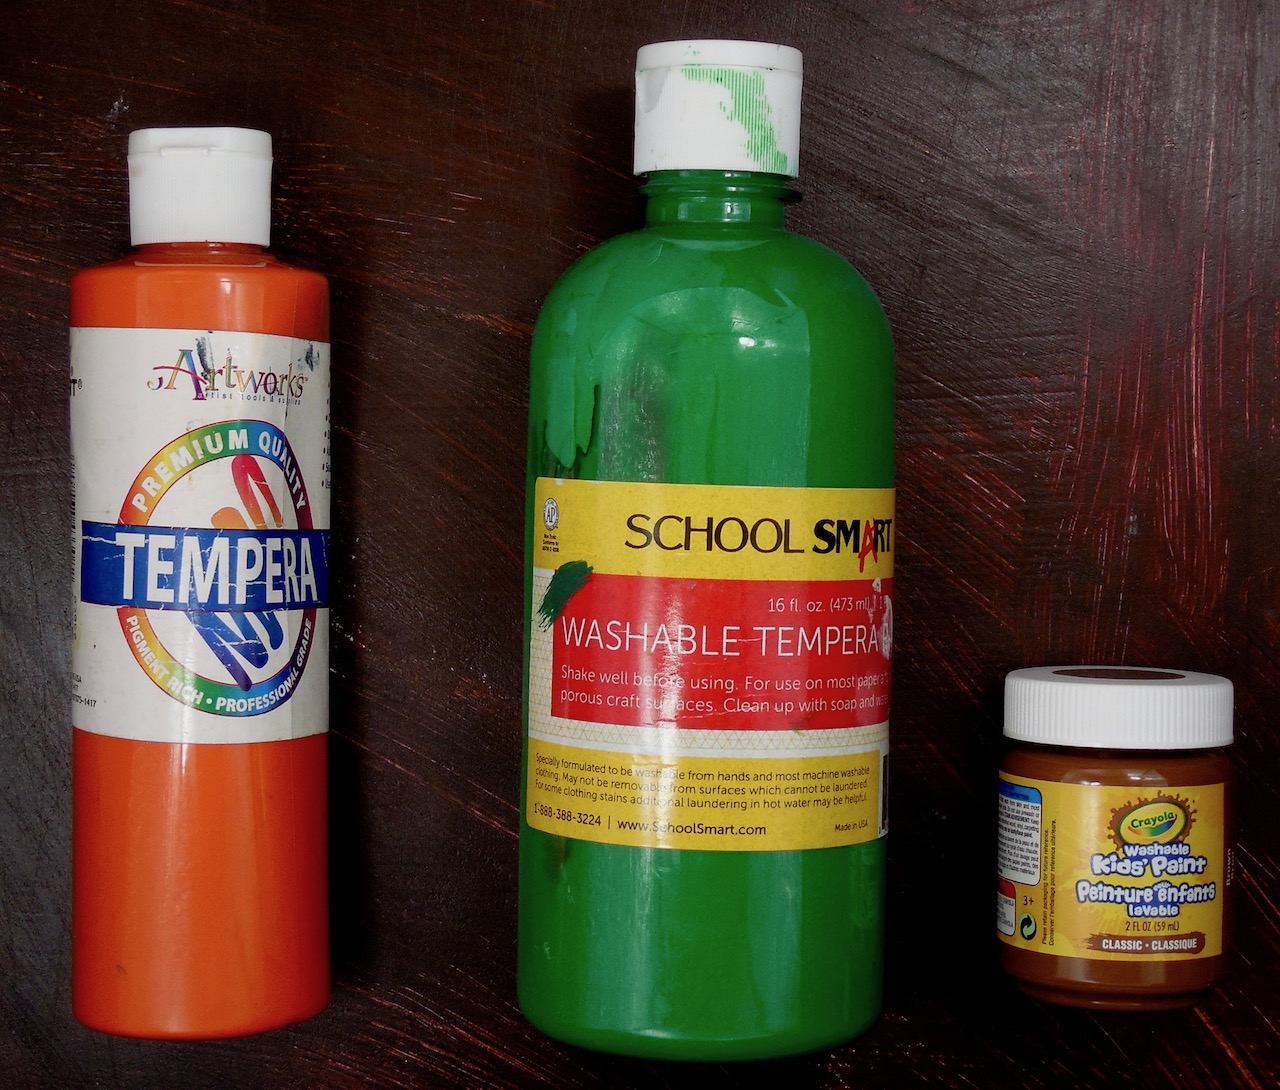
Here’s what happened.
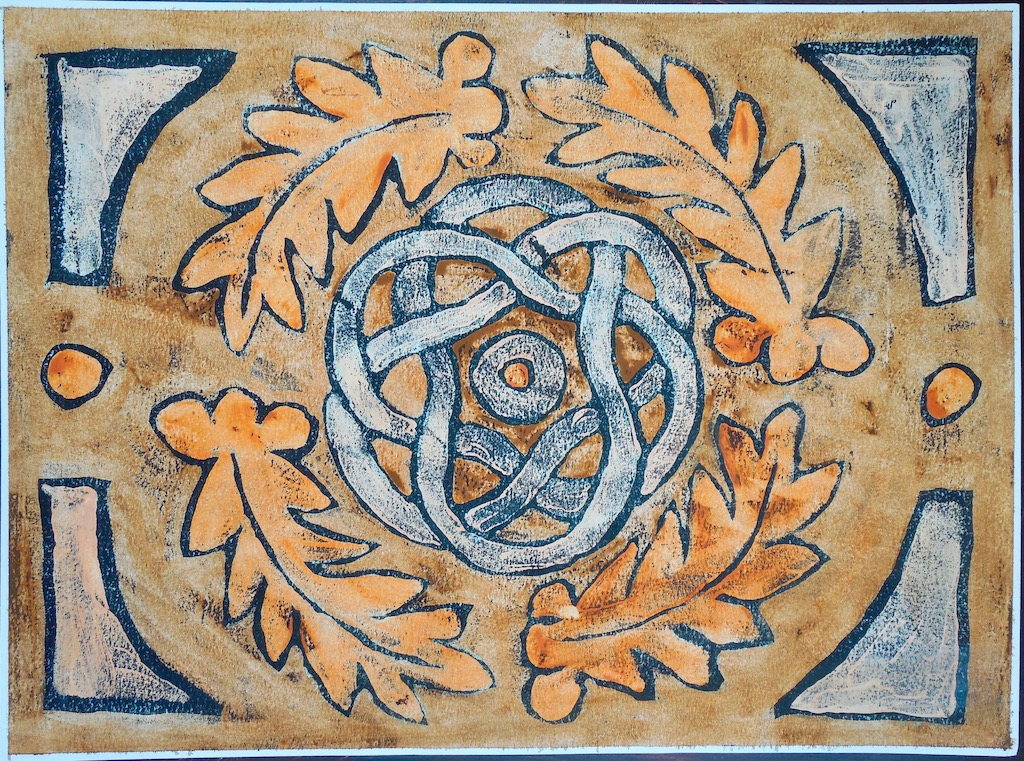
The orange ArtWorks tempera didn’t wash off the paper very well, but it DID create a rather striking image when we washed (most of) the paint off the paper.
The paint that performed the most like our expectations was the School Smart tempera paint. Notice how nicely the tempera washed off, leaving the ink behind.
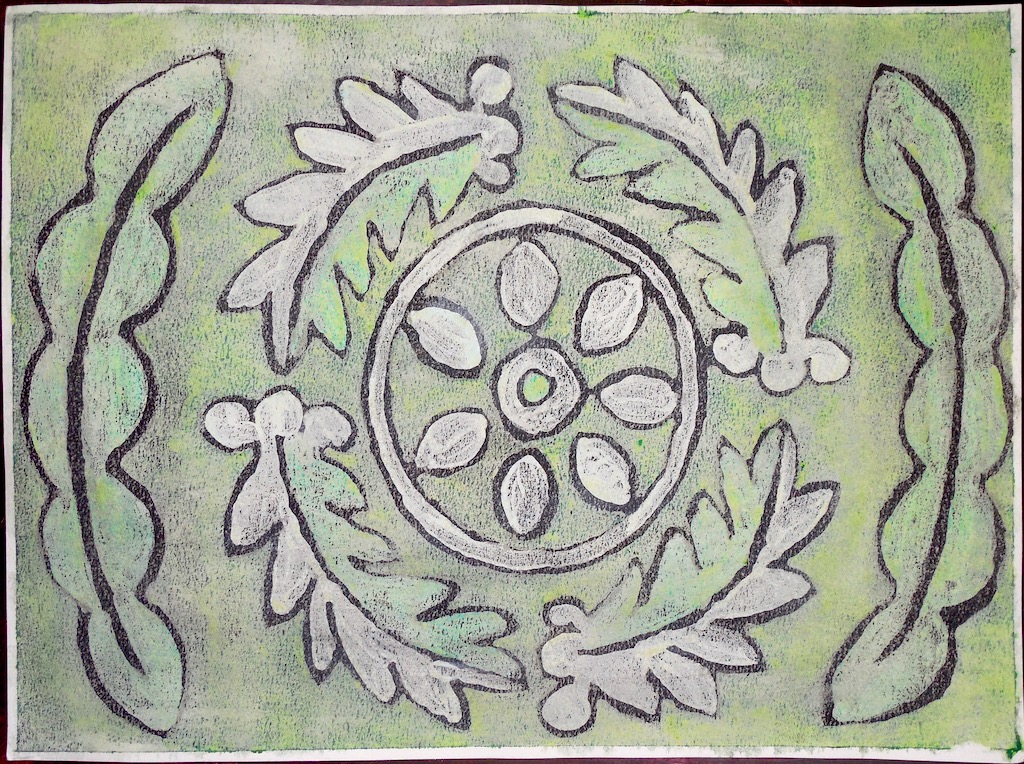
The most disappointing results came from using the Crayola tempera paint. By the time we had washed some of the paint off, we had scrubbed the paper so much the ink had been lost.
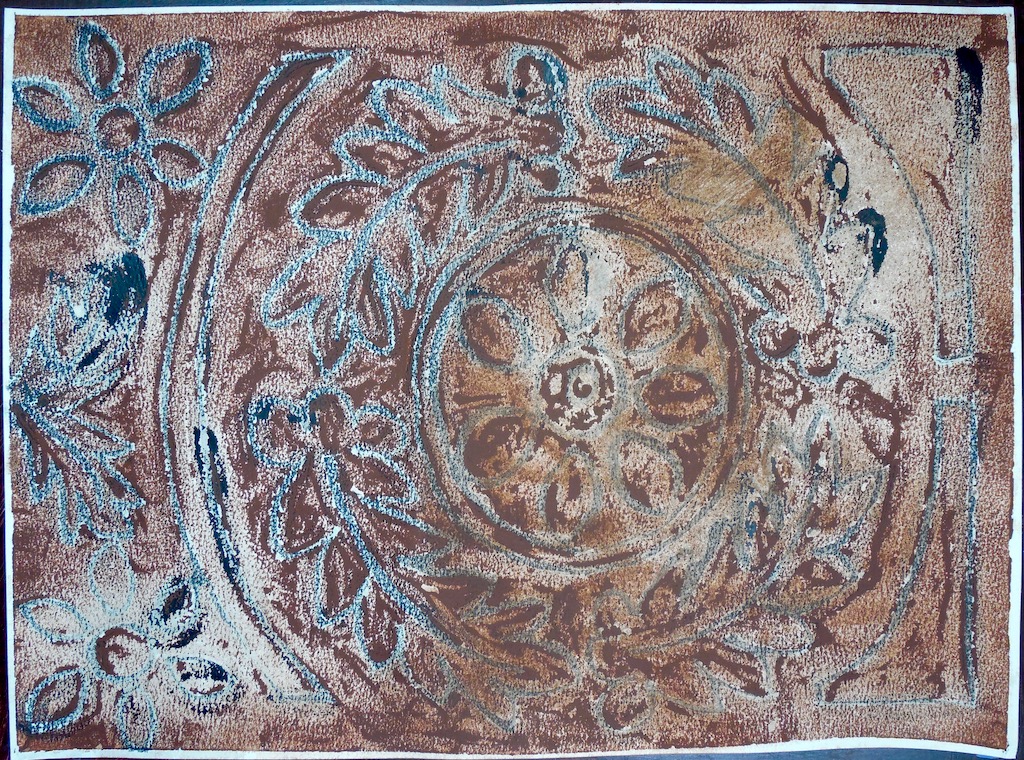
The result?
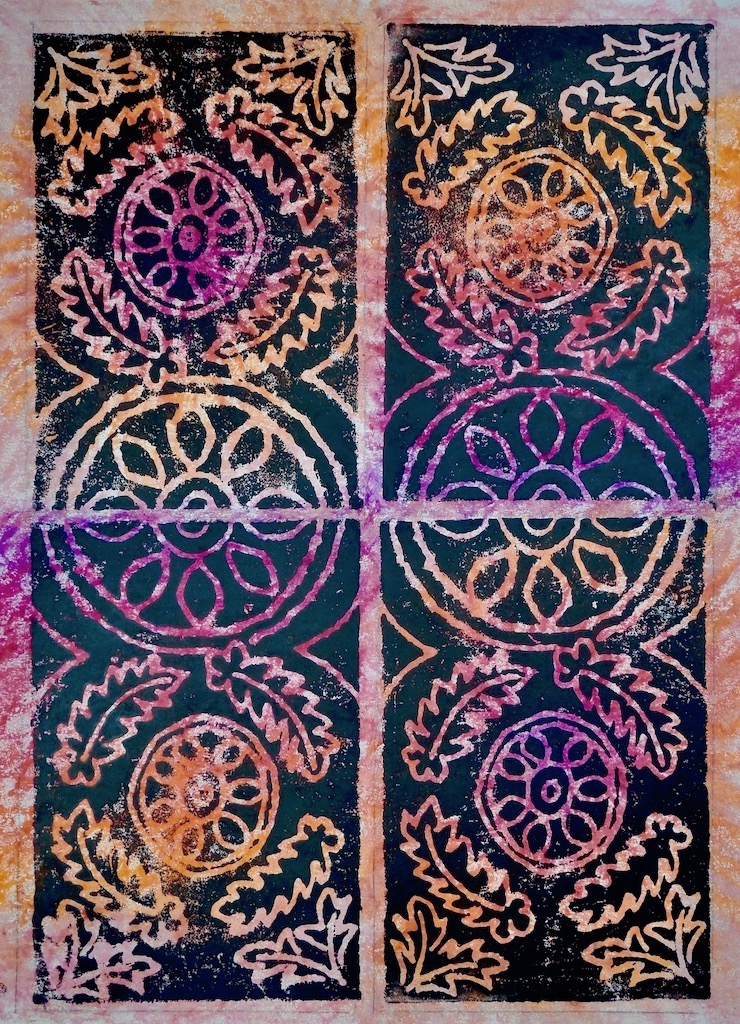
With such varied outcomes, we decided that India ink resist was NOT a good technique for an ArtAchieve art project. We could just imagine the tears of students who had worked hard, only to see their efforts ruined. Tempera paints are too varied to be dependable for a satisfying outcome. We decided to use the synagogue carvings as inspiration for a printing project instead, and here is an example of a finished project for the new art lesson, The Carvings of Capernaum. We hope your kids like this lesson and learn a lot about Israel in the process!
We’ve just added a new art lesson to the ArtAchieve website, The Carvings of Capernaum, and creating the lesson was an emphatic reminder that sometimes art projects DON’T turn out the way we had hoped.
In Capernaum, on the north shore of the Sea of Galilee in Israel, we had found some carvings in the ruins of a synagogue where Jesus had preached.
Here is what remains of the synagogue.

And here are the carvings that inspired us to create a new art lesson.

We decided to use an art technique called India ink resist, a technique that uses tempera paint and India ink to produce beautiful, worn black lines that are almost impossible to produce any other way. They would be a perfect reflection of the synagogue carvings.
Unfortunately, the project was a failure. I’ll explain why shortly, but it was a good lesson for us in dealing with the question of what to do when a project “doesn’t turn out.” In our case, we went to plan B, and the whole experience was a good lesson in persistence.
Here’s how India ink resist is SUPPOSED to be done, in order to get those beautiful black lines.
-
Step 1: On a sheet of watercolor paper, you draw a picture using a drawing medium of your choice - pencil, chalk, colored pencils work well. We used colored chalk. It makes a nice fat line, and it disappears under India ink.
-
Step 2: You use tempera paint to paint any part of the paper that is NOT covered with a line. The idea is that tempera paint - and any ink that is on the paint - can be washed off the paper later.
-
Step 3: You paint over the picture with India ink. You can concentrate on painting only the chalk lines - the part without tempera paint - or you can cover the entire paper with ink.
-
Step 4: You take the paper that is now covered with ink and tempera paint to the sink, and run water over it, gently rubbing the paint until it washes away. What is left is the black line of ink wherever there was no tempera paint.
However, we discovered one complicating factor that makes all the difference. Not all tempera paints interact the same way with India ink!
To insure that the technique would work for ANYBODY, I bought three brands of tempera paint, a professional brand (ProArt), and two student brands (School Smart and Crayola).

Here’s what happened.
The orange ArtWorks tempera didn’t wash off the paper very well, but it DID create a rather striking image when we washed (most of) the paint off the paper.

The paint that performed the most like our expectations was the School Smart tempera paint. Notice how nicely the tempera washed off, leaving the ink behind.

The most disappointing results came from using the Crayola tempera paint. By the time we had washed some of the paint off, we had scrubbed the paper so much the ink had been lost.

The result?
With such varied outcomes, we decided that India ink resist was NOT a good technique for an ArtAchieve art project. We could just imagine the tears of students who had worked hard, only to see their efforts ruined. Tempera paints are too varied to be dependable for a satisfying outcome. We decided to use the synagogue carvings as inspiration for a printing project instead, and here is an example of a finished project for the new art lesson, The Carvings of Capernaum. We hope your kids like this lesson and learn a lot about Israel in the process!

We’ve just added a new art lesson to the ArtAchieve website, The Carvings of Capernaum, and creating the lesson was an emphatic reminder that sometimes art projects DON’T turn out the way we had hoped.
In Capernaum, on the north shore of the Sea of Galilee in Israel, we had found some carvings in the ruins of a synagogue where Jesus had preached.
Here is what remains of the synagogue.

And here are the carvings that inspired us to create a new art lesson.

We decided to use an art technique called India ink resist, a technique that uses tempera paint and India ink to produce beautiful, worn black lines that are almost impossible to produce any other way. They would be a perfect reflection of the synagogue carvings.
Unfortunately, the project was a failure. I’ll explain why shortly, but it was a good lesson for us in dealing with the question of what to do when a project “doesn’t turn out.” In our case, we went to plan B, and the whole experience was a good lesson in persistence.
Here’s how India ink resist is SUPPOSED to be done, in order to get those beautiful black lines.
-
Step 1: On a sheet of watercolor paper, you draw a picture using a drawing medium of your choice - pencil, chalk, colored pencils work well. We used colored chalk. It makes a nice fat line, and it disappears under India ink.
-
Step 2: You use tempera paint to paint any part of the paper that is NOT covered with a line. The idea is that tempera paint - and any ink that is on the paint - can be washed off the paper later.
-
Step 3: You paint over the picture with India ink. You can concentrate on painting only the chalk lines - the part without tempera paint - or you can cover the entire paper with ink.
-
Step 4: You take the paper that is now covered with ink and tempera paint to the sink, and run water over it, gently rubbing the paint until it washes away. What is left is the black line of ink wherever there was no tempera paint.
However, we discovered one complicating factor that makes all the difference. Not all tempera paints interact the same way with India ink!
To insure that the technique would work for ANYBODY, I bought three brands of tempera paint, a professional brand (ProArt), and two student brands (School Smart and Crayola).

Here’s what happened.
The orange ArtWorks tempera didn’t wash off the paper very well, but it DID create a rather striking image when we washed (most of) the paint off the paper.

The paint that performed the most like our expectations was the School Smart tempera paint. Notice how nicely the tempera washed off, leaving the ink behind.

The most disappointing results came from using the Crayola tempera paint. By the time we had washed some of the paint off, we had scrubbed the paper so much the ink had been lost.

The result?
With such varied outcomes, we decided that India ink resist was NOT a good technique for an ArtAchieve art project. We could just imagine the tears of students who had worked hard, only to see their efforts ruined. Tempera paints are too varied to be dependable for a satisfying outcome. We decided to use the synagogue carvings as inspiration for a printing project instead, and here is an example of a finished project for the new art lesson, The Carvings of Capernaum. We hope your kids like this lesson and learn a lot about Israel in the process!


