Introduce Symmetry To Kids In K-2 With This Easy Butterfly Project
Here's a painting project that offers a bunch of advantages:
-
It introduces kids in grades K-2 to symmetry,
-
It carries an element of surprise,
-
It can also introduce kids to the idea of color mixing, and
-
On a gloomy wintry day it is sure to bring a big burst of color to the room!
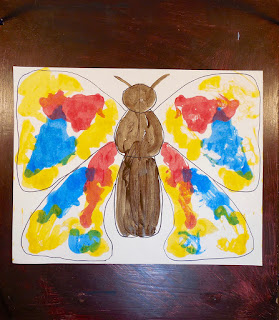
The project is to paint a butterfly, and the trick is to paint with somewhat watery paints on only one half of the butterfly. When you fold the paper in half and press the wet paint onto the other half, you get a bright, perfectly symmetrical painting.
Here's how.
Start with
-
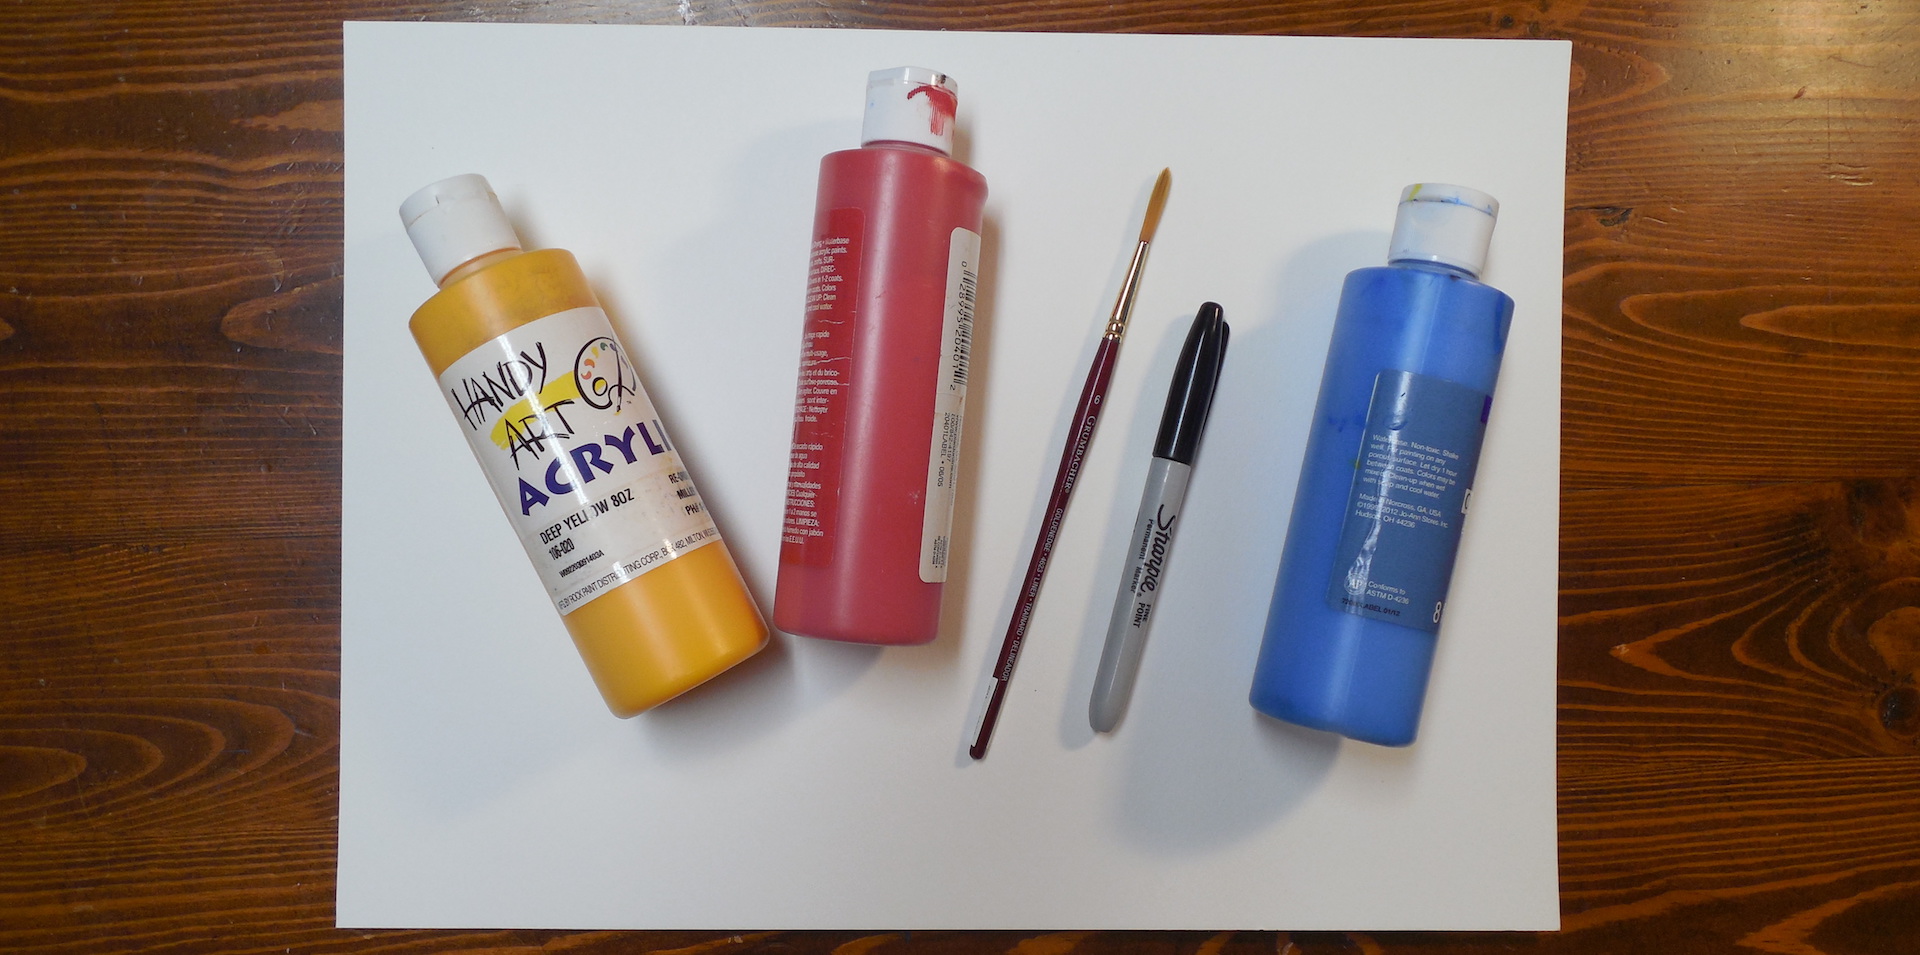
A sheet of drawing paper, construction paper, or watercolor paper (I used 11" x 14" drawing paper),
-
A paint brush,
-
A fine-tipped black magic marker,
-
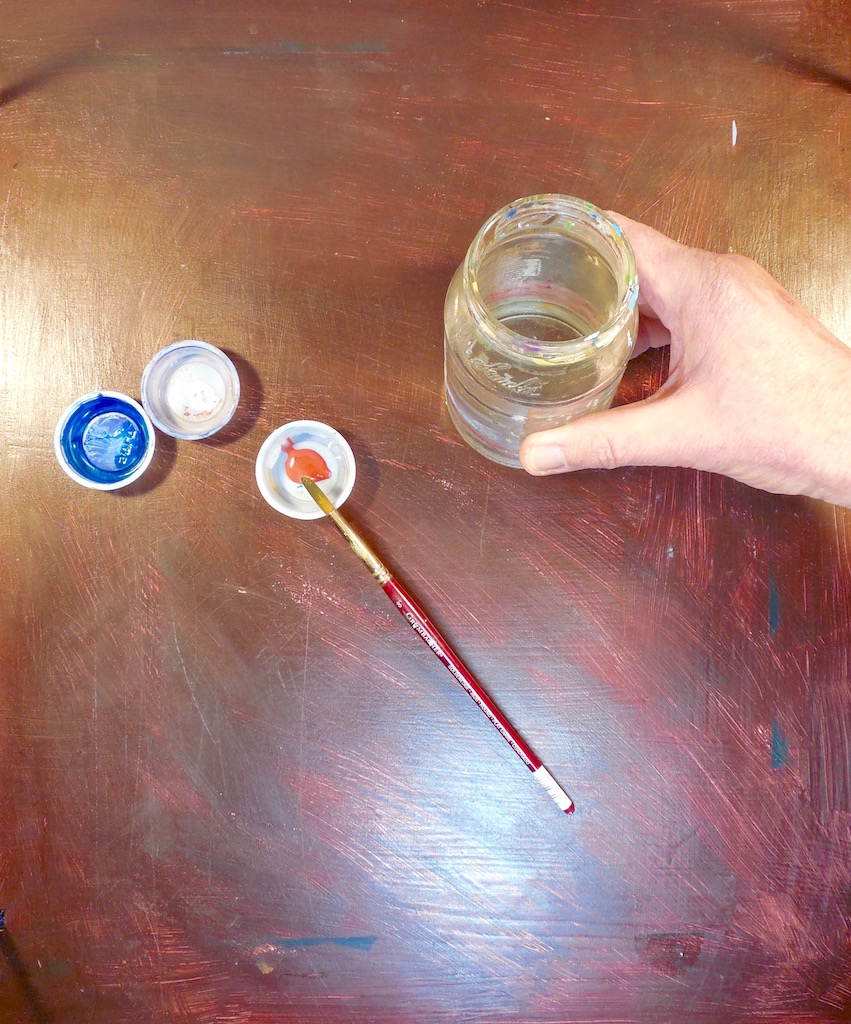
Three primary colors (red, blue, and yellow) of liquid acrylic paint or liquid tempera paint,
-
A paint palette or three small containers for paint, and
-
A bottle of water for rinsing brushes
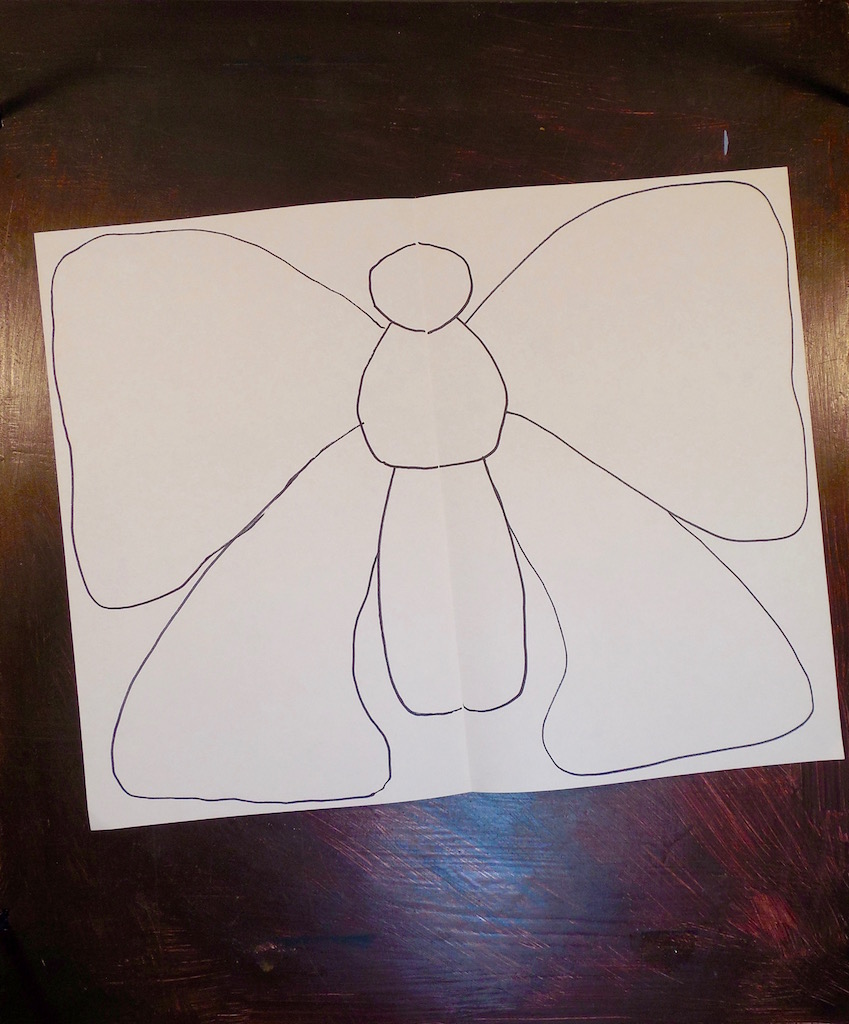
Fold the paper in half so that the paper ends up half as tall (not half as wide) as it was. Draw half of a butterfly along the fold line - something that looks like this.

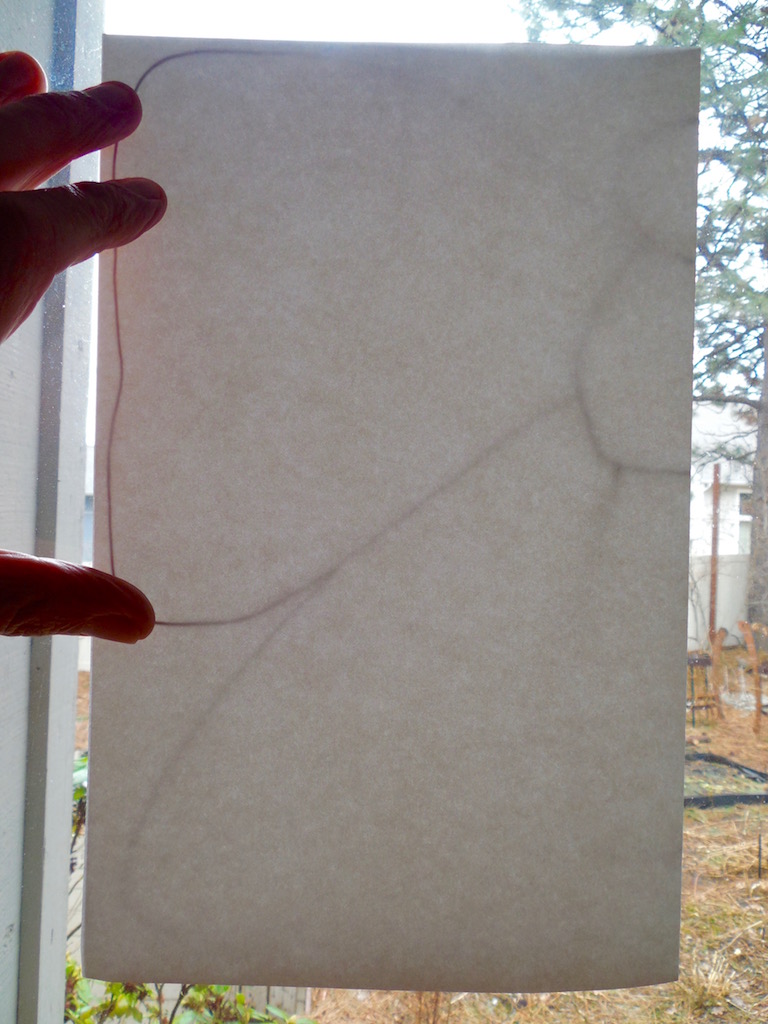
Then turn the paper upside down, hold the paper against the window and trace the half-butterfly you have drawn onto the other half of the paper.
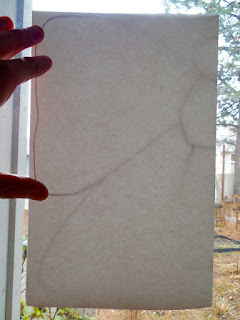
When you open the paper, you see a symmetrical butterfly drawing. If you draw the body quite fat, like I did, the butterfly will end up looking like a fat moth! But so what? Call it a moth if it looks like a moth!

Refold the paper so the butterfly is on the inside of the fold, like it would be if it were inside a book.

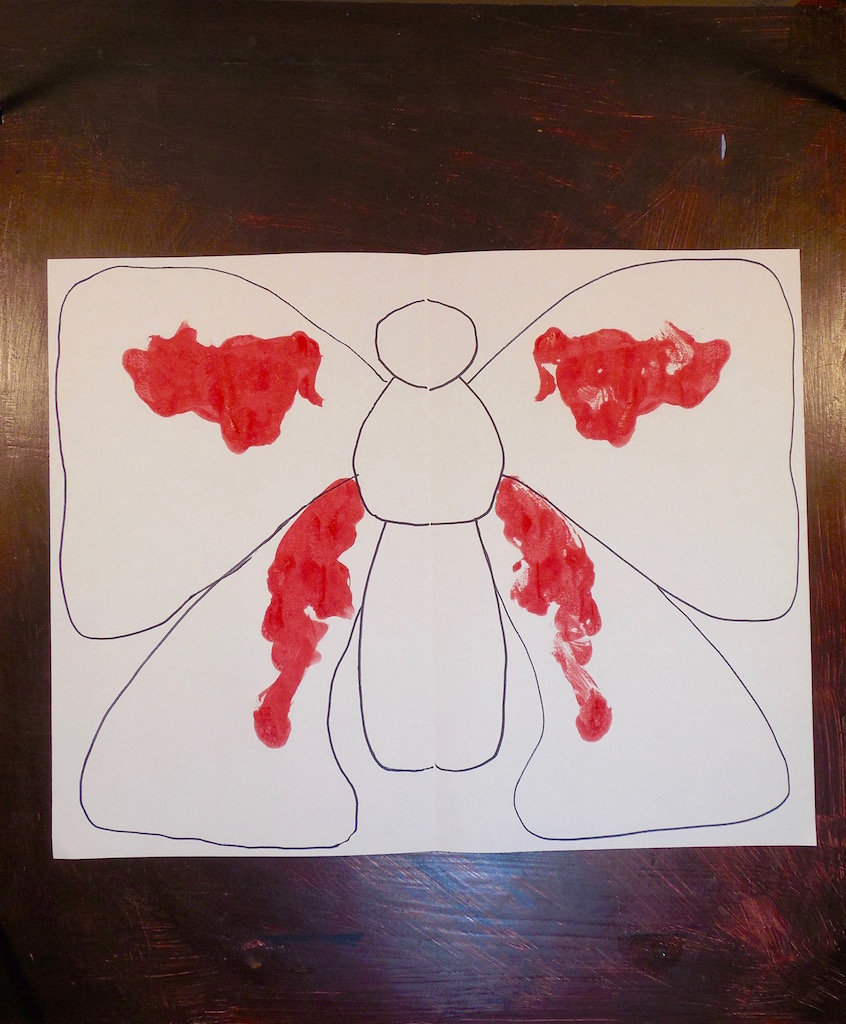
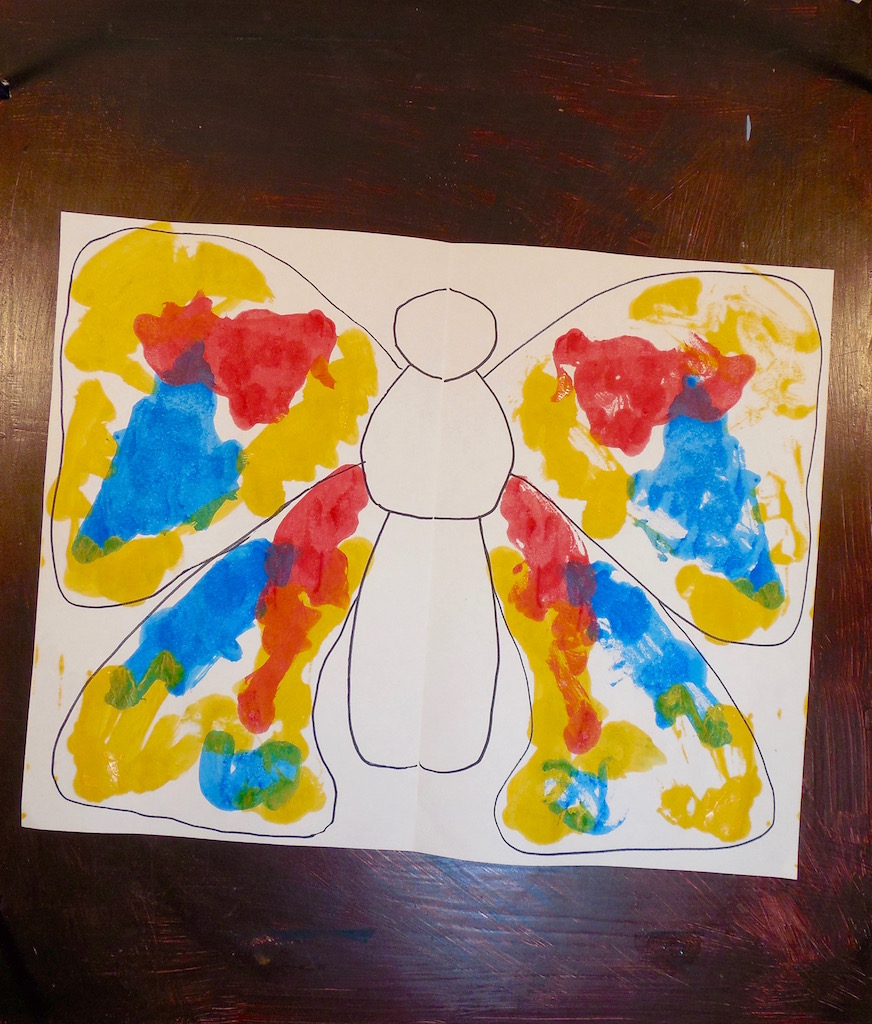
Add a little water to one of the paints, paint a small area of the butterfly, fold the paper together, and rub, rub, rub!


Your painting will be symmetrical IF YOU HAVE WORKED WITH ONLY A SMALL AREA, AND IF YOUR PAINT IS WET. As you can see, some of the red dried before I folded the paper.

Do this with all three colors. If colors run over each other, you'll enjoy some color mixing - a bonus of the process!

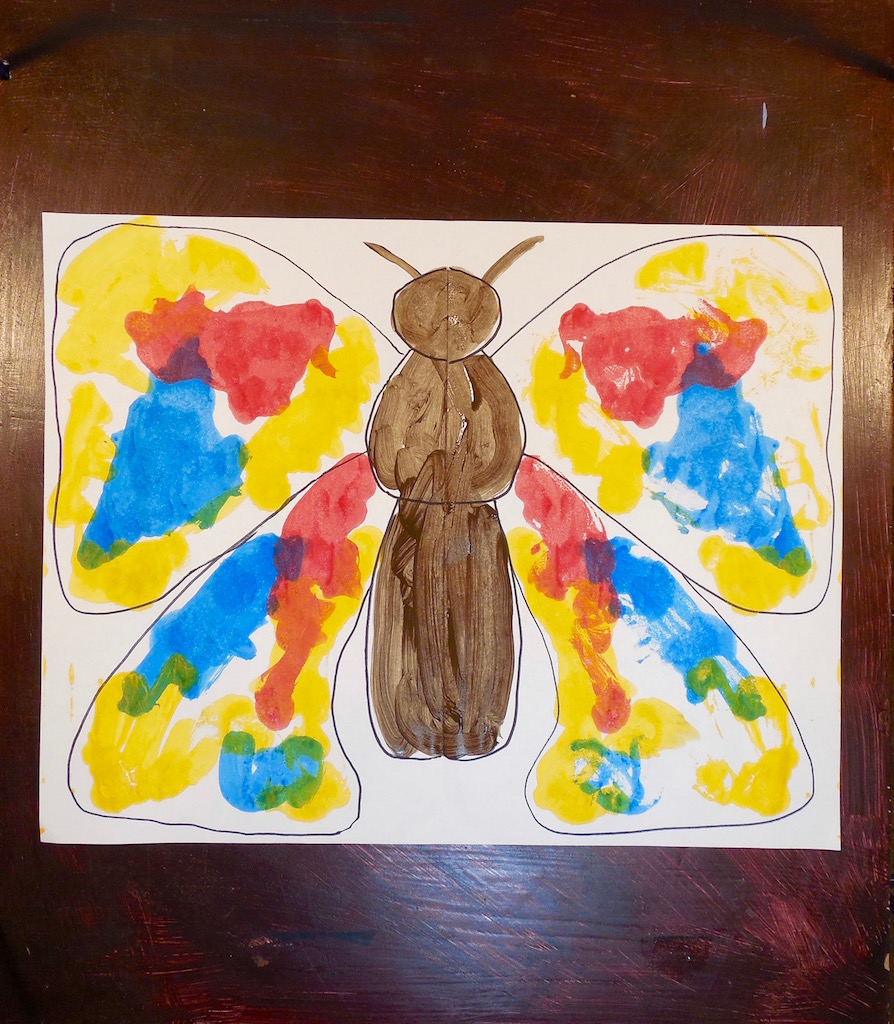
If you like, you can paint the body after the wings are all finished.
Now is a good time to talk about the SYMMETRY you have created, and to go on a "Symmetry Hunt."
-
Head outdoors (or indoors) and find other examples of symmetry.
-
Discover palindromes like EYE, and RACECAR, and MADAM I'M ADAM
Older students will prefer ArtAchieve's art lesson, Hiding Butterflies,
where they can learn more about symmetry and insect camouflage.
HAVE FUN WITH SYMMETRY!
Here's a painting project that offers a bunch of advantages:
-
It introduces kids in grades K-2 to symmetry,
-
It carries an element of surprise,
-
It can also introduce kids to the idea of color mixing, and
-
On a gloomy wintry day it is sure to bring a big burst of color to the room!
The project is to paint a butterfly, and the trick is to paint with somewhat watery paints on only one half of the butterfly. When you fold the paper in half and press the wet paint onto the other half, you get a bright, perfectly symmetrical painting.
Here's how.
Start with
-
A sheet of drawing paper, construction paper, or watercolor paper (I used 11" x 14" drawing paper),
-
A paint brush,
-
A fine-tipped black magic marker,
-
Three primary colors (red, blue, and yellow) of liquid acrylic paint or liquid tempera paint,
-
A paint palette or three small containers for paint, and
-
A bottle of water for rinsing brushes
Fold the paper in half so that the paper ends up half as tall (not half as wide) as it was. Draw half of a butterfly along the fold line - something that looks like this.
Then turn the paper upside down, hold the paper against the window and trace the half-butterfly you have drawn onto the other half of the paper.
When you open the paper, you see a symmetrical butterfly drawing. If you draw the body quite fat, like I did, the butterfly will end up looking like a fat moth! But so what? Call it a moth if it looks like a moth!
Refold the paper so the butterfly is on the inside of the fold, like it would be if it were inside a book.
Add a little water to one of the paints, paint a small area of the butterfly, fold the paper together, and rub, rub, rub!
Your painting will be symmetrical IF YOU HAVE WORKED WITH ONLY A SMALL AREA, AND IF YOUR PAINT IS WET. As you can see, some of the red dried before I folded the paper.
Do this with all three colors. If colors run over each other, you'll enjoy some color mixing - a bonus of the process!
If you like, you can paint the body after the wings are all finished.
Now is a good time to talk about the SYMMETRY you have created, and to go on a "Symmetry Hunt."
-
Head outdoors (or indoors) and find other examples of symmetry.
-
Discover palindromes like EYE, and RACECAR, and MADAM I'M ADAM
Older students will prefer ArtAchieve's art lesson, Hiding Butterflies,
where they can learn more about symmetry and insect camouflage.
HAVE FUN WITH SYMMETRY!